
Zipline & ShareX Guide
Your Private Screenshot Tool: Zipline & ShareX Guide
Who can use this: Everyone with an account on our server.
Taking screenshots and sharing them is now instant, private, and free. By using our self-hosted Zipline server with the ShareX tool, you avoid the privacy risks, file deletion, and subscription fees of public services like Imgur. Your data stays on our server, links never expire unexpectedly, and the process is automatic: snap a picture, and the link is instantly copied to your clipboard.
Why Public Services Are Risky and Limiting
Using free online tools to share images often comes with hidden costs and dangers that affect your privacy and convenience.
-
Privacy Issues: When you upload to public sites, companies can scan your images for advertising or train AI models with your personal data. Your files are often public by default and can be found by strangers.
-
Link Rot and Limits: Free services often delete your files after a few months of inactivity, breaking your old links. They also compress your images to save space, making them look blurry, and restrict file sizes.
-
Subscription Traps: Many services start free but force you to pay monthly fees for basic features like higher quality or more storage. They lock you into their ecosystem, making it hard to leave.
-
Security Risks: Storing data on big corporate servers makes you vulnerable to large data breaches where your personal information could be exposed.
Why Our Self-Hosted Zipline Is Better
Zipline is a tool we run on our own server, giving you full control and a better experience without the downsides of public websites.
- You Own Your Data: Your files are stored on our private server, not a third-party company's computer. You decide who sees them and how long they last.
-
No Fees or Limits: There are no monthly costs. You can upload any image or video file type, and the only limit is our server's storage, which is much larger than free public tiers.
-
Advanced Features: You can create links that expire automatically, protect files with passwords, or limit how many times a link can be viewed.
-
Perfect Workflow: Integrated with ShareX, it makes sharing effortless. You take a screenshot, and it automatically uploads and copies a short link to your clipboard in seconds, ready to be instantly shared with friends.
Step-by-Step Setup Guide
1. Log In to Zipline
-
Open your web browser and go to
https://ss.necc.me. -
The system recognizes you automatically. You will be logged in instantly via Authentik Single Sign-On (SSO) using your existing account.
-
Else it will redirect you to our main authentication page; just confirm your identity there.
-
2. Get Your Configuration File
Before installing any software, you need to download a special settings file from Zipline.
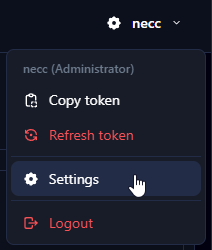
- Once logged in, look for your username in the top-right corner of the screen.
-
Click it and select "Settings".
-
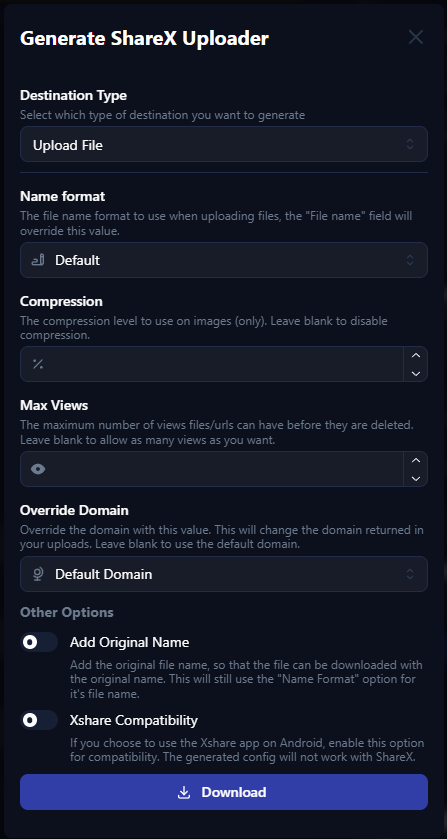
Scroll down until you see the "ShareX" section under "Generate Uploaders".

-
Click the "Download" button. This saves a small file (ending in
.sxcu) to your computer. This file contains your unique key.
3. Download and Install ShareX
Warning: Only download ShareX from its official website to avoid viruses. Do not use other sites.
- Go to
https://getsharex.com/in your browser. - Click the big "Download" button and run the installer file.
- Follow the simple steps to install it on your computer.
4. Connect ShareX to Zipline
Now you will tell ShareX to use our server for your uploads.
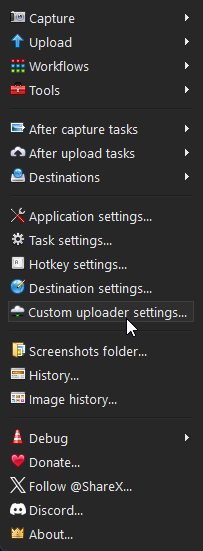
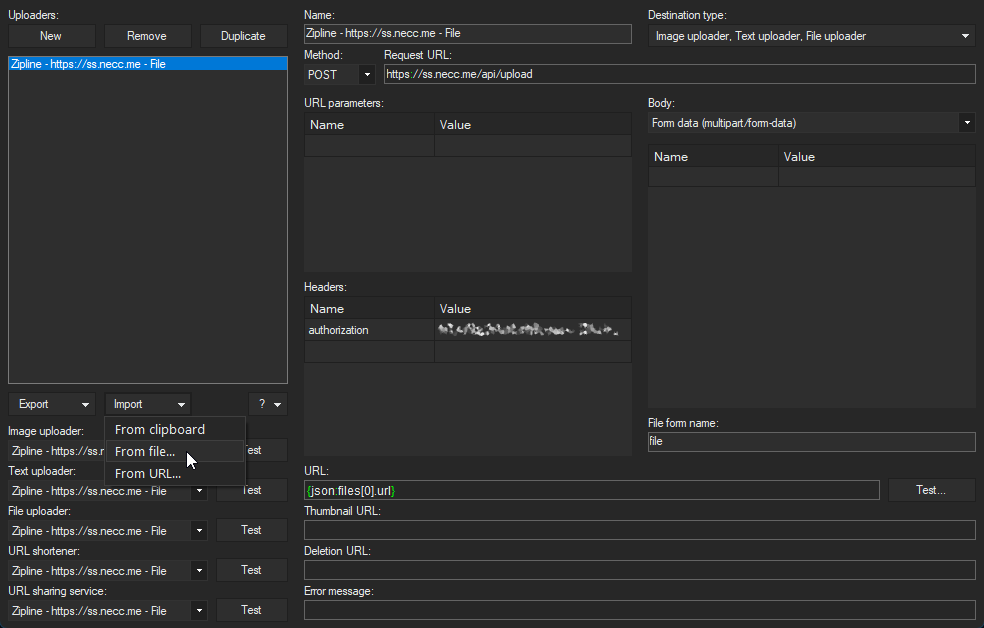
- > Import > From file... and select the
.sxcufile you downloaded in Step 2 or you can drag and drop the downloaded.sxcufile into the Uploaders: window.
5. Enable Automatic Uploads
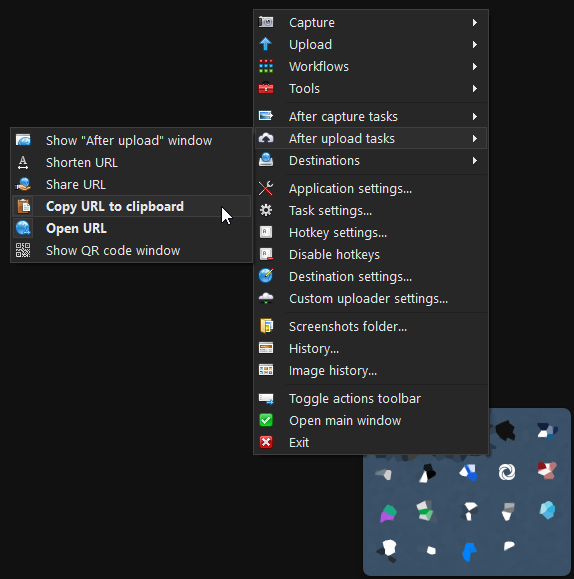
To make sure every screenshot is uploaded and the link copied automatically, check these two settings.
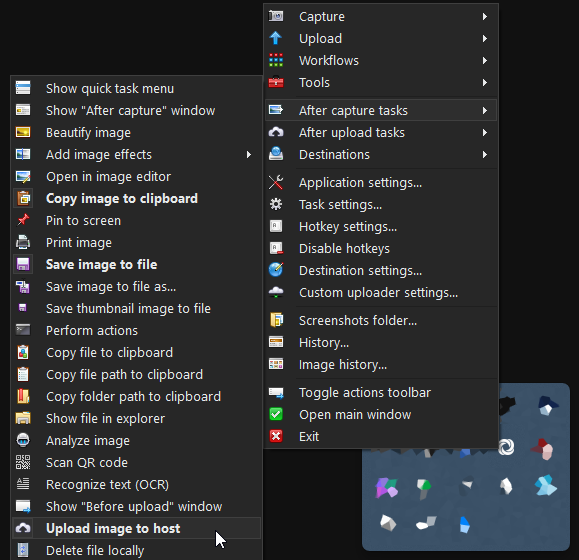
- Look for the "After upload tasks" menu. Ensure "Copy URL to clipboard" is checked.
-
- Optional: You may select the "Open URL" to open your web browser with the captured image.
- Test it: Press the
Print Screenkey or use the "Capture" button to take a screenshot of a small area. -
-
Wait a moment for the upload notification. Then, try pasting (
Ctrl+V) into a chat or document. You should see a short link to your image!
-